
Opensource routing: Taking a first glance Open Source Routing Machine(OSRM)
Published:
In the past, I have explored OpenTripPlanner, which is a multi-modal routing engine. In this article, I am going to setup Open Source Routing Machine (OSRM), which is a popular open-source routing engine and its backend is written in C++. The engine usage our favourite OpenStreetMap (OSM) data to build the network graph. It offers HTTP API for easy integration with the any existing or new frontend application. There is also wrapper available for NodeJS. It is well documented http://project-osrm.org/. In contrast to many other routing engines, it usage multilevel Dijkstra’s or contraction hierarachies algorithm instead of A*. Thus, offers a super-fast routing. It supports routing based on transportation profile, currently support car, bike or foot. It offers 6 services, including the possibility to snap nearest matches, routing of course, map matching, table, trip and tile; see here for details. In addition to JSON response, we could also binary FlatBuffer which is great to speed up the process.
Setup a local server
We will focus only on the backend part which basically provide the logic component. OSRM project also provide the frontend application, which we will not focus in this article but feel free to check that out. For the backend, starting point is the GitHub repository. I am going to use the docker to run the setup which isolate the environment and allow us to easily scale, if needed. Docker image registry is also hosted on GitHub.
Let’s pull the latest image from the registry:
docker pull ghcr.io/project-osrm/osrm-backend:v5.27.1
Now, download sample (or full-) network data for OSM. We will use generous server of GeoFabrik for it. For this example, let’s use Noord-Holland where Amsterdam city is located. We will use the same city in future as well because of good possibility to include bicycling paths and public transport facilities. To download the latest OSM extract, from your terminal (you can also use wget or manually from this link):
curl -o noord-holland-latest.osm.pbf https://download.geofabrik.de/europe/netherlands/noord-holland-latest.osm.pbf
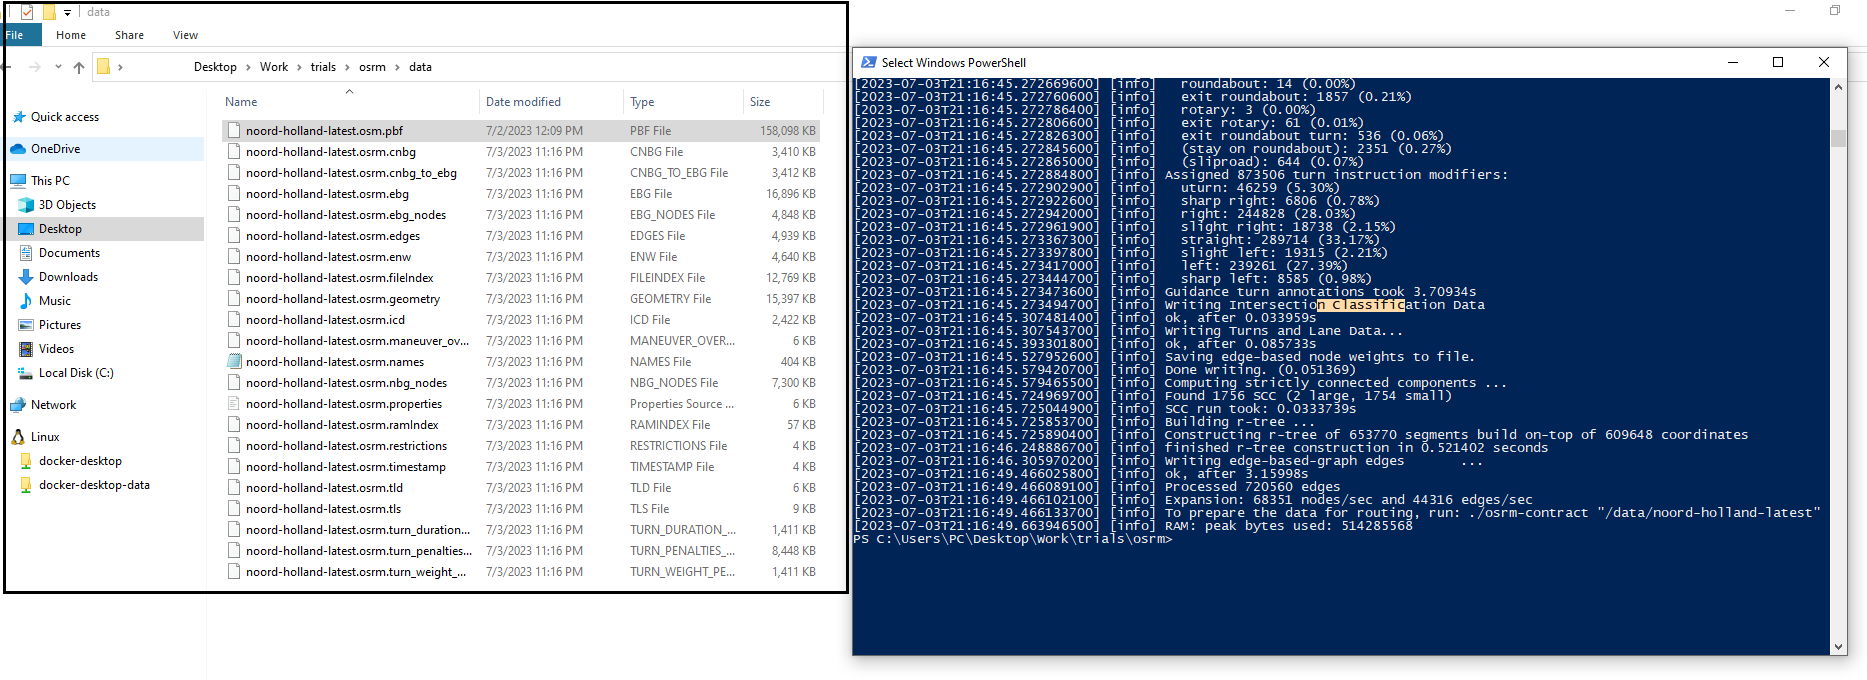
We keep the above osm file into a data directory. If you’re on windows then from this point onwards, we need to use PowerShell. As all OSM data in the downloaded pbf file is not useful for the routing purpose, therefore, as a first step, we will preprocess the file with the osrm-extract tool. This will filter out the unnecessary information in addition to setting up hard rules. Addionally, we need to pass profile option with -p which consider the mode of transportation as documented here. We can modify these by editing the underlying lua file. For e.g., car.lua file has defines all tags, penalties etc., and can act as inspiration to create a custom profile for a very specific use-case.
docker run -t -v ${PWD}\data:/data ghcr.io/project-osrm/osrm-backend osrm-extract -p /opt/car.lua /data/noord-holland-latest.osm.pbf
You might receive a pop-up to allow “Docker Desktop File Sharing” as we have mounted our local data folder (where we kept osm file) inside the docker as data folder. For this OSM file, process took around 1.5 minutes and yield multiple osrm file (as shown below).
We further proceed with following command of osrm-partition, which will partition the *.osrm files generated from above step into the cells.
docker run -t -v ${PWD}\data:/data ghcr.io/project-osrm/osrm-backend osrm-partition /data/noord-holland-latest.osrm
It took around 5 seconds. As a final step of processing data, we use osrm-customize to weigh the cells.
docker run -t -v ${PWD}\data:/data ghcr.io/project-osrm/osrm-backend osrm-customize /data/noord-holland-latest.osrm
Now, we can turn on the server with the build network
docker run -t -i -p 5000:5000 -v ${PWD}\data:/data ghcr.io/project-osrm/osrm-backend osrm-routed --algorithm mld /data/noord-holland-latest.osrm
And, we are ready to make a request:
curl “http://localhost:5000/route/v1/driving/4.934452,52.356016;4.929624,52.347785?steps=true”
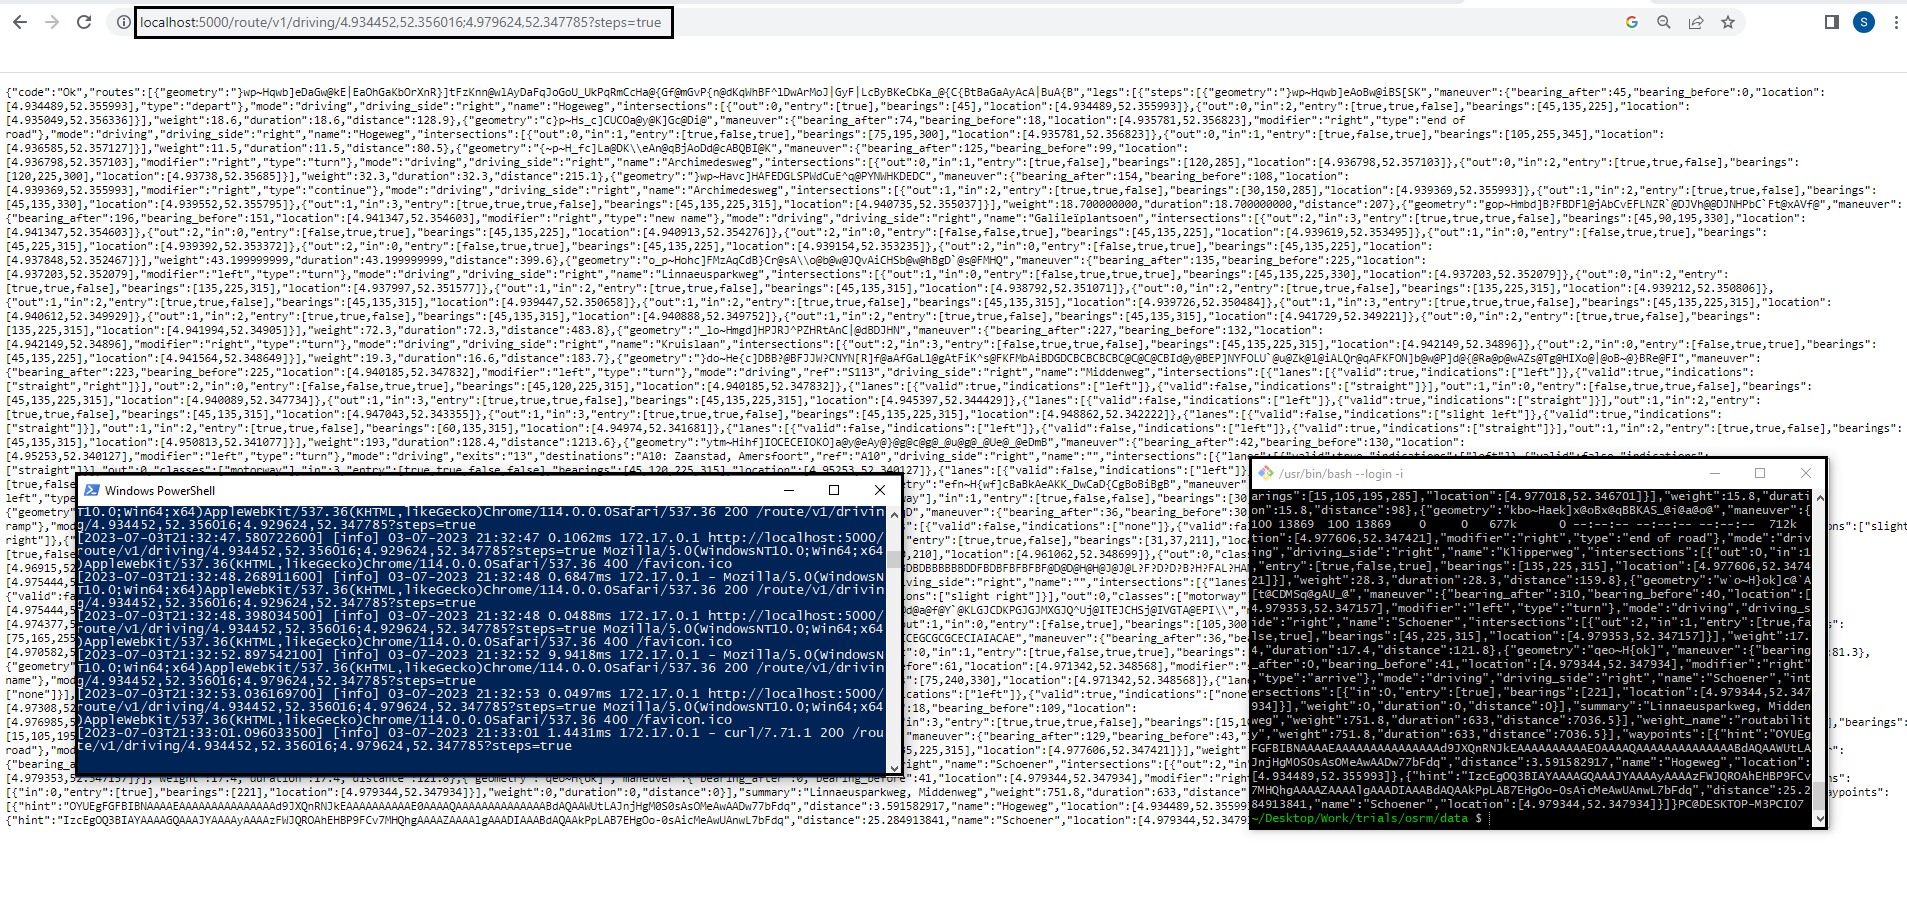
We can understand the JSON response with the documentation. If we want to use a different profile than the car then we need to regenerate the data starting with osrm-extract command. It is an IO intensive task when we preprocess the data so it advisable to use large RAM along with SSDs to speed up and accommodate large data size.
Trials with Python
As a next advance step, we can build a custom pipeline in the Python using the REST APIs from OSRM. We can easily create the interface with the request module in Python. However, there exist a great package for routing called routingpy. This great library makes routing interface very easy and it supports many open source and commercial providers. I will use this package as well in the next parts where I will deploy other open source solution for the routing. Following notebook provides the steps:
Jupyter notebook
Following example is based on routingpy and taken from official guide.
# Install following requirements (by uncommenting)
# ! pip install routingpy folium
from routingpy.routers import OSRM
import folium
# Coordinates for direction query
coordinates = [(4.840713,52.342610),( 4.841656,52.371995),(4.824203,52.384809),(4.774909,52.392150),(4.841184,52.455866)]
# API Server where we've hosted OSRM (see blog to setup)
api = OSRM(base_url = 'http://localhost:5000')
%%timeit
route = api.directions(locations=coordinates, profile='driving-car')
21.6 ms ± 2 ms per loop (mean ± std. dev. of 7 runs, 10 loops each)
Visualize the queried coordinates and provided route in the folium map
my_map = folium.Map(location=coordinates[0][::-1], zoom_start=12, tiles="Stamen Terrain")

# Add all coordinates to the map as marker
for idx, coord in enumerate(coordinates):
    folium.Marker(coord[::-1], tooltip=f"coord-{idx}").add_to(my_map)

# Plot direction as line
folium.PolyLine([coord[::-1] for coord in route.geometry], tooltip="Directions").add_to(my_map)

# Display the map
my_map
# Optional to convert data into a geopandas df
# ! pip install routingpy folium shapely geopandas contextily polyline
#from shapely.geometry import LineString, Point
#import geopandas as gpd
#start_end = gpd.GeoDataFrame(geometry=[Point(x,y) for x,y in coordinates], crs="EPSG:4326").to_crs("EPSG:3857")
#route_line = gpd.GeoDataFrame(geometry=[LineString(route.geometry)], crs="EPSG:4326").to_crs("EPSG:3857")
It takes 21.6 ms for the queries, which I consider as very fast. This conclude the OSRM. In next part, I’ll try to replicate the process with other opensource routing engine.
Connect with me on LinkedIn for any questions! 